Pages

Wednesday, September 29, 2010

Ella's Pink Scrapbook - Challenge #25

It's time for another scrapbook challenge! But first we need to announce our winner from our Sept. 15th School Theme challenge.

Congratulations to *** Cecelia ***


Feel free to grab this blinkie to display on your blog


And now on to our scrap challenge for this week


"The Color Aqua, Designer Paper

& Embellishment of your Choice"


The Pink Elephant Designers

________Ella's Girls________
Link
KimmyFly Away
Sarahse1
BethSunshine
Fern
TrudiDSC00433
Jennifer

AngelaBeatriz
Now we'd like to see what you've created, just post a link to your layout!

Monday, September 27, 2010

DIY Giant Glitter Brads

I recently bought some blingy, glittery brads... 4 packs, and I'm sure I could have bought more. I WANTED EVERY COLOR!!! I started looking at the glittery ones & thought, "I could make that!". So I did.... and here's how I did it! You can click on any of the images to get a closer look!

SUPPLIES
Build-a-Brads from Stampin' Up!
Crystal Effects from Stampin' Up!
Any color glitter you like!

Step One -

As you can see the edges of the bare brad are raised a bit, so put a few dots of
Crystal Effects onto the head of the brad & spread it around until it covers
the top in a thin layer. I stuck my brad into a leftover piece of rubber so I
wouldn't have to hold it. I also made sure it was as level as possible. That's important later... you could poke yours through the top of a paper cup or something...

Step Two -
Apply glitter generously to the brad right after step one, before it dries. Now's when you'll be glad you propped your brad up. Let it dry for a while before moving on. Maybe 10 or 15 minutes.

Step Three-
Once it's not tacky any longer, squirt on some more Crystal Effects, and using the tip of the applicator, spread it around fairly evenly. The cool thing about this stuff is that it dries clear, and also adheres to itself.... so it will "help" you by spreading itself out as it dries... that's why it's important for the brad to be level.

Step Four-
Again apply a good layer of glitter before it dries... then let it dry for another 15 minutes.

Step Five-

Okay, this is the last time you'll apply Crystal Effects. Again, put a few drops on & spread it around... and then maybe even a few more! Make sure it thickly covers all the glitter. Remember, it will dry clear. Let it dry completely. I let mine sit for an hour or so...

You're done! If you look closely in the above picture, you can see how the top of the brad is rounded... another cool thing that Crystal Effects does!


I hope you get a chance to make some of these...


(This post was originally published on my blog on 11.17.09)

Thursday, September 23, 2010

MINI BROWN BAG APPLE BASKET Tutorial

Good morning! A week or so ago, I made a little basket out of a brown paper bag, and I thought I'd share this little mini tutorial with you! Honestly if this project took longer than 30 minutes, I'b be shocked! I was actually talking on the phone while I constructed it! Now, you're not going to be able to carry a bowling ball around in this basket, but it could be used for a cute little place card holder, or treat holder! If you want something a little more durable, you could use cardstock.


1 - Start with a brown paper bag that you've cut apart at the seams.
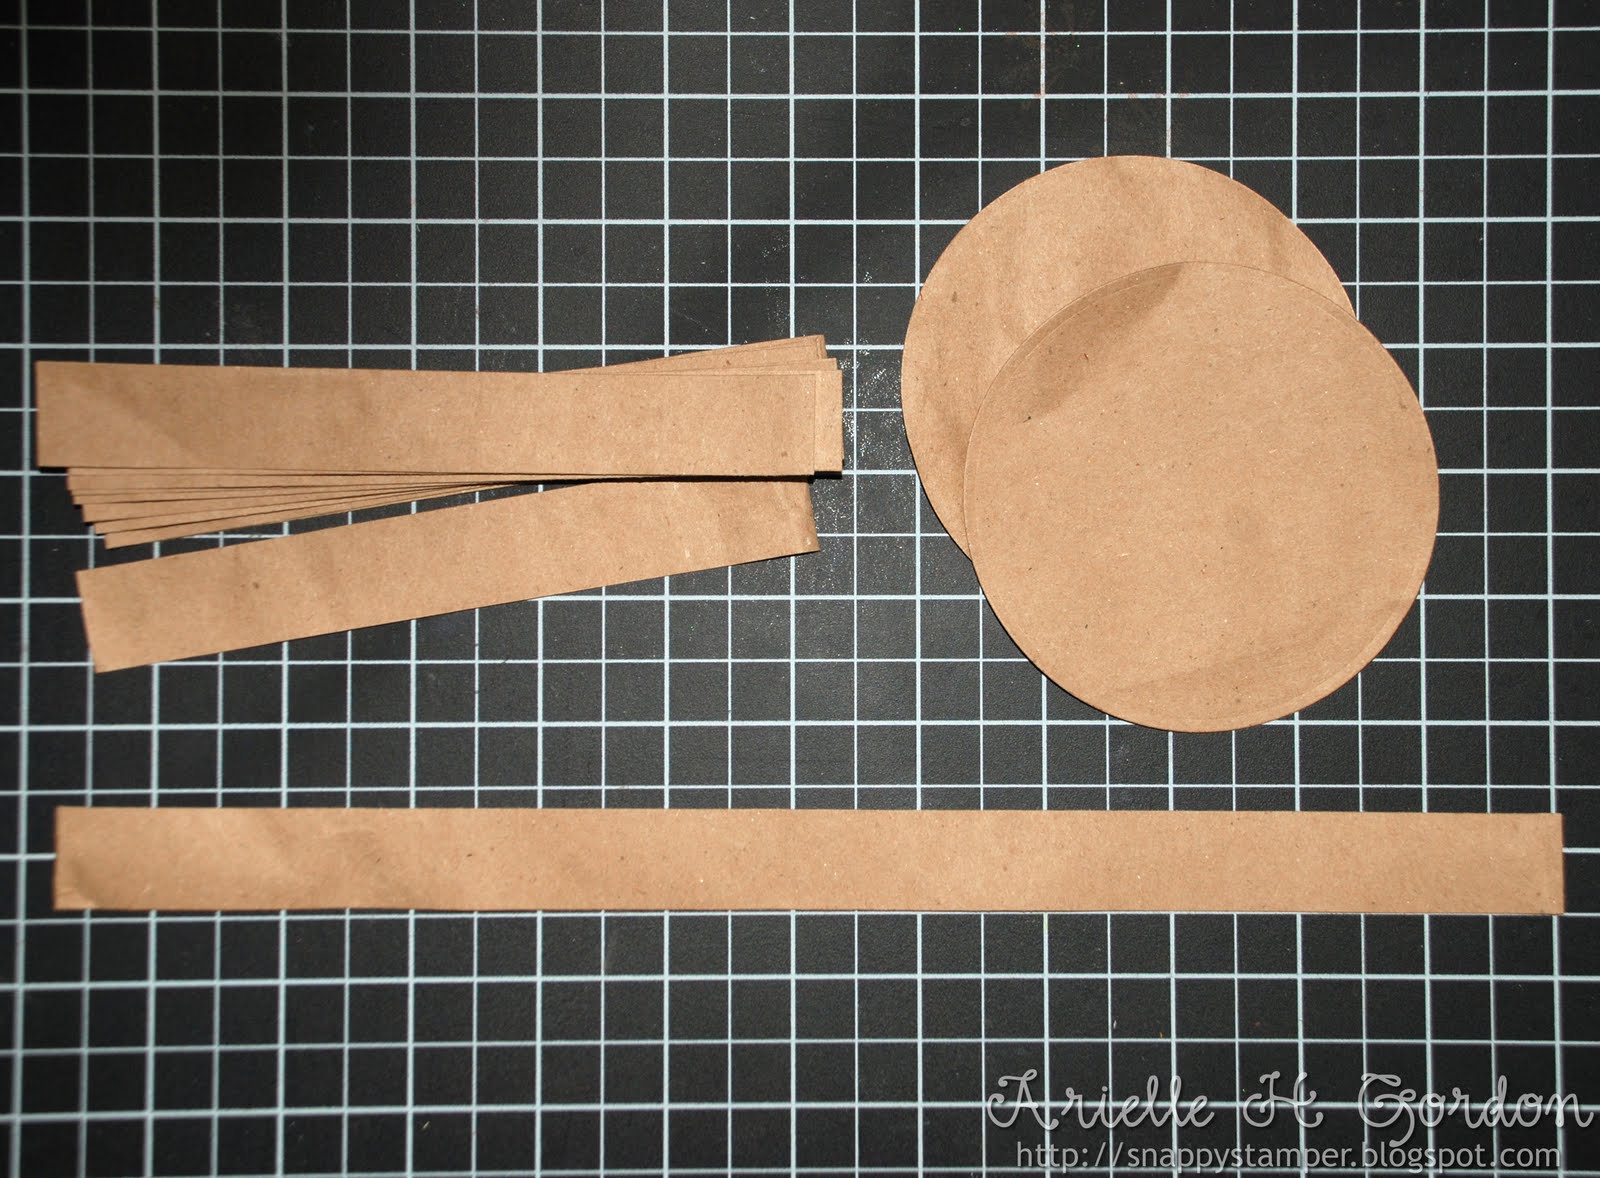
2 - Cut 2 circles, I used a Nestability with a diameter of 3 3/4". The cut 6 strips measuring 6" x 3/4" and one strip measuring 12" x 3/4".
3 - Cut three slits into one end of the 6" strips and both ends of the 12" strip. My slits are about 1/4".
4 - Crease each strip where the slits end.


5 - Apply adhesive to one of the circles. I was in a hurry, so I used my ATG gun... you could also run it through a Xyron.
6 - Adhere the slitted end of one of the short strips to the top of the base circle. The slits will allow you to 'contour' the strip around the edge of the circle. Make sure the crease of your strip is right on the edge of the circle or outside the circle just a pinch.
7 - When you place the 2nd strip, place it directly opposite the first. Continue with all the strips, leaving a space for the longest strip, which will be the handle of the basket.


8 - Place the 2 ends of the 12" strip just like you did the shorter ones.
9 - Spread adhesive on the 2nd circle and then slip it onto the top of the first, sandwiching the ends of the strips.


10 - Now cut 2 strips that are 1/2" x 13" or more. You'll use these to weave around the basket, in and out of the other strips. Start by adhering one end of the strips around the handle, about a 1/4" from the bottom.
11 - I used small adhesive dots and would lift up the side strips as I went along, weaving in and out. Then secure the strip back at the handle where you started and weave the next one. Again, start the second about a 1/4" above the first weave.


12 - Once you've finished the second, trim the ends of the small vertical strips to about a 1/4" - 1/2" above the top weave. I cut mine on a slight diagonal.
13 - Fold the trimmed ends down over the top weave & secure with brads.

VoilĂ  - c'est magnifique!

Here's my finished project from last week. I used the digital stamp set, Harvest from Kathy Martin, who by the way will be sponsoring an upcoming challenge here at the Pink Elephant! YAY! You should go pay Kathy a visit, she's currently having a little give-away on her blog!

If you'd like to see a little more info about my project, please visit me here!


Bye for now & happy crafting!!!


Monday, September 20, 2010

The Pink Elephant - TPE84


"The Color Aqua, Designer Paper
& Embellishment of your Choice"


Our Sponsor this week is:
Heather Ellis of Digi Stamp Characters


Digi Stamp Characters will be giving one lucky randomly drawn winner 3 digi images of their choice from their Etsy Shop!!
Thanks so much Digi Stamp Characters for your sponsorship!!!


The Pink Elephant Designers

________Ella's Girls________
Link


Jennifer Hagfeldt


Tina Quinata


Debbie Marcinkiewicz


__________________________________


Thanks so much for joining us!!
________________________

Challenges will
begin on
Mondays at 12 Midnight EST
and
close on
Sundays at 12 midnight EST

If you upload your card to SCS, PCP or any other
gallery please use keyword TPE, but also add a
link to it in Mr. Linky so we are sure to see it.


_________________________________

Wednesday, September 15, 2010

Ella's Pink Scrapbook - Challenge #24

It's time for another scrapbook challenge! But first we need to announce our winner from our Sept. 2nd favorite color and favorite embellishment challenge.

Congratulations to

Feel free to grab this blinkie to display on your blog


Her blue & pink just caught my eye and those flowers are so yummy!
Beautiful layout!

We

Now lets get to this week's challenge!


Are you up for a theme challenge? This week's theme is "Back to School". The Cutting Cafe has sponsored our card and scrap challenge these past two weeks. You can see their school digi's in Kimmy's & Trudi's layouts this week.

Here are the layouts from the design team

Beatriz
100_5607


Sarah


Angela


Kimmy


Fern


Jennifer


Tina


Beth

Mary


Jenn


Trudi
DSC00332

Now it's your turn!
Let's see those back to school layouts!
Just post a link to your layout by midnight September 29th.