
Hello ladies! I'm back again after taking a break to be with family these past couple months. I've got a couple quick easy tutorials to share with you today using hand dyed crinkle ribbon. I am sponsoring the upcoming TPE challenge on monday where the girls will be using some of my hand dyed ribbon which I sell on my website the pink petal designs.
I love how easy this ribbon is to work with, it has been my go to ribbon for awhile now and the fact that I have a TON of colors really helps too! This first technique shows you how to gather your ribbon.
You'll want to tie a knot in one end of the ribbon.

Then on the other end start to fray the edge a bit
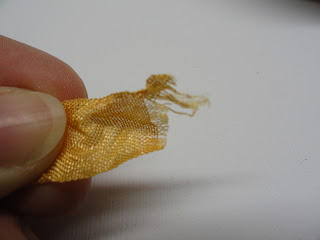
Pull a few of the center threads and start pulling working your way down to the other end of the ribbon.

Now you have a piece of gathered ribbon to use on your card or project.

This next tutorial is rather elementary, well to me at least :) I thought I would share it with you though since I have found while teaching classes it's not so elementary :) Here is how you tie a double bow.
Hold the ribbon with the end in the middle of your fingers

Wrap the ribbon loosely around three fingers. Go around your fingers twice for a double bow or three times for a triple. Then snip the end of the ribbon.

Now carefully take the loops from your fingers and lay them on a short piece of ribbon.

Tie your loops together in the middle, now you have your bow! You will need to play around with it some and you may need to trim up the ends too.

Here's my card using both these techniques.

And my last little tutorial is super easy. For this all you have to do is put down a strip of adhesive where you want the ribbon to go.

Then starting from one end lay the ribbon down while you sort of crinkle or bunch it onto the adhesive. This is what you'll end up with.

And here is the finished card.

I hope you try some of these out and be sure to stop back monday to see what the design team girls have created!
No comments:
Post a Comment