Pages

Showing posts with label recipe. Show all posts

Thursday, October 17, 2013

Project Thursday: {HALLOWEEN} White Chocolate Peanut Butter Bars

Every Year we try to include a Sweet Treat in our Neighborhood Boo Bags.

 One of our favorites - that I make way too often - is Home Made Peanut Butter Bars. 

I wanted the Boo Bag Treats to look Halloweenish, so I changed the recipe to make it more colorful.


White Chocolate Peanut Butter Bars

INGREDIENTS

20 Halloween Oreo Cookies
1/4 Cup Melted Butter

1   Cup Butter
 1 1/2   Cup Creamy Peanut Butter
2   Cups Graham Cracker Crumbs
2   Cups Confectioners Sugar
1/2   Cup Chocolate Chips
1 1/2   Cup White Chocolate Chips
2   Tablespoons Shortening

DIRECTIONS

1.  Melt 1/4 cup butter in medium bowl.  Crush Oreo Cookies (using a food processor) into small crumbs.  Add to melted butter and stir until well coated. 

2.  Spread cookie crumb mixture onto bottom of 9 X 13 pan and refrigerate until firm.

3.  Melt 1 cup butter and peanut butter in large bowl in microwave - stirring frequently until smooth. 

4.  Add graham cracker crumbs and confectioners sugar to melted mixture and stir until well combined.  Set aside.

5.  Melt chocolate chips in microwave until smooth.

6.  Spread melted chocolate over cookie crust (this helps keep the cookie crumbs together and adhere them to the peanut butter layer).

7.  Spread peanut butter mixture evenly over cookie/chocolate crust and refrigerate until set.

8.  Melt white chocolate chips and shortening in microwave - stirring frequently until smooth.

9.  Spread over peanut butter mixture.

10.  Sprinkle with festive Halloween non-pareils, jimmies or quins.

11.  Refrigerate until firm - at least one hour.  Cut into squares.


I was very excited to use Halloween Oreo cookies for the crust.  I expected it to look like black and orange speckles once they were crushed.


 That's not exactly how it turned out.  They ended up looking plain black once they were mixed together, but it still worked fine. 


 When you are mixing together the sugar, peanut butter, graham crumbs and butter - it seems like the mixture will never combine - just keep working.


It all comes together and magically looks exactly like the inside of a Peanut Butter Cup.  Even the strange texture of the graham crackers is perfect.  Not too smooth, not too course.  Delicious.


Melting chocolate (white or milk) can be a bit tricky in the microwave.  Be sure not to over cook (or it will turn chalky).  I usually stop and stir every 30 seconds.  It will look like they are not melting (because they still hold their shape), but as soon as you stir the chips, they collapse into liquid.

If you feel more comfortable - the double boiler method is always an option.
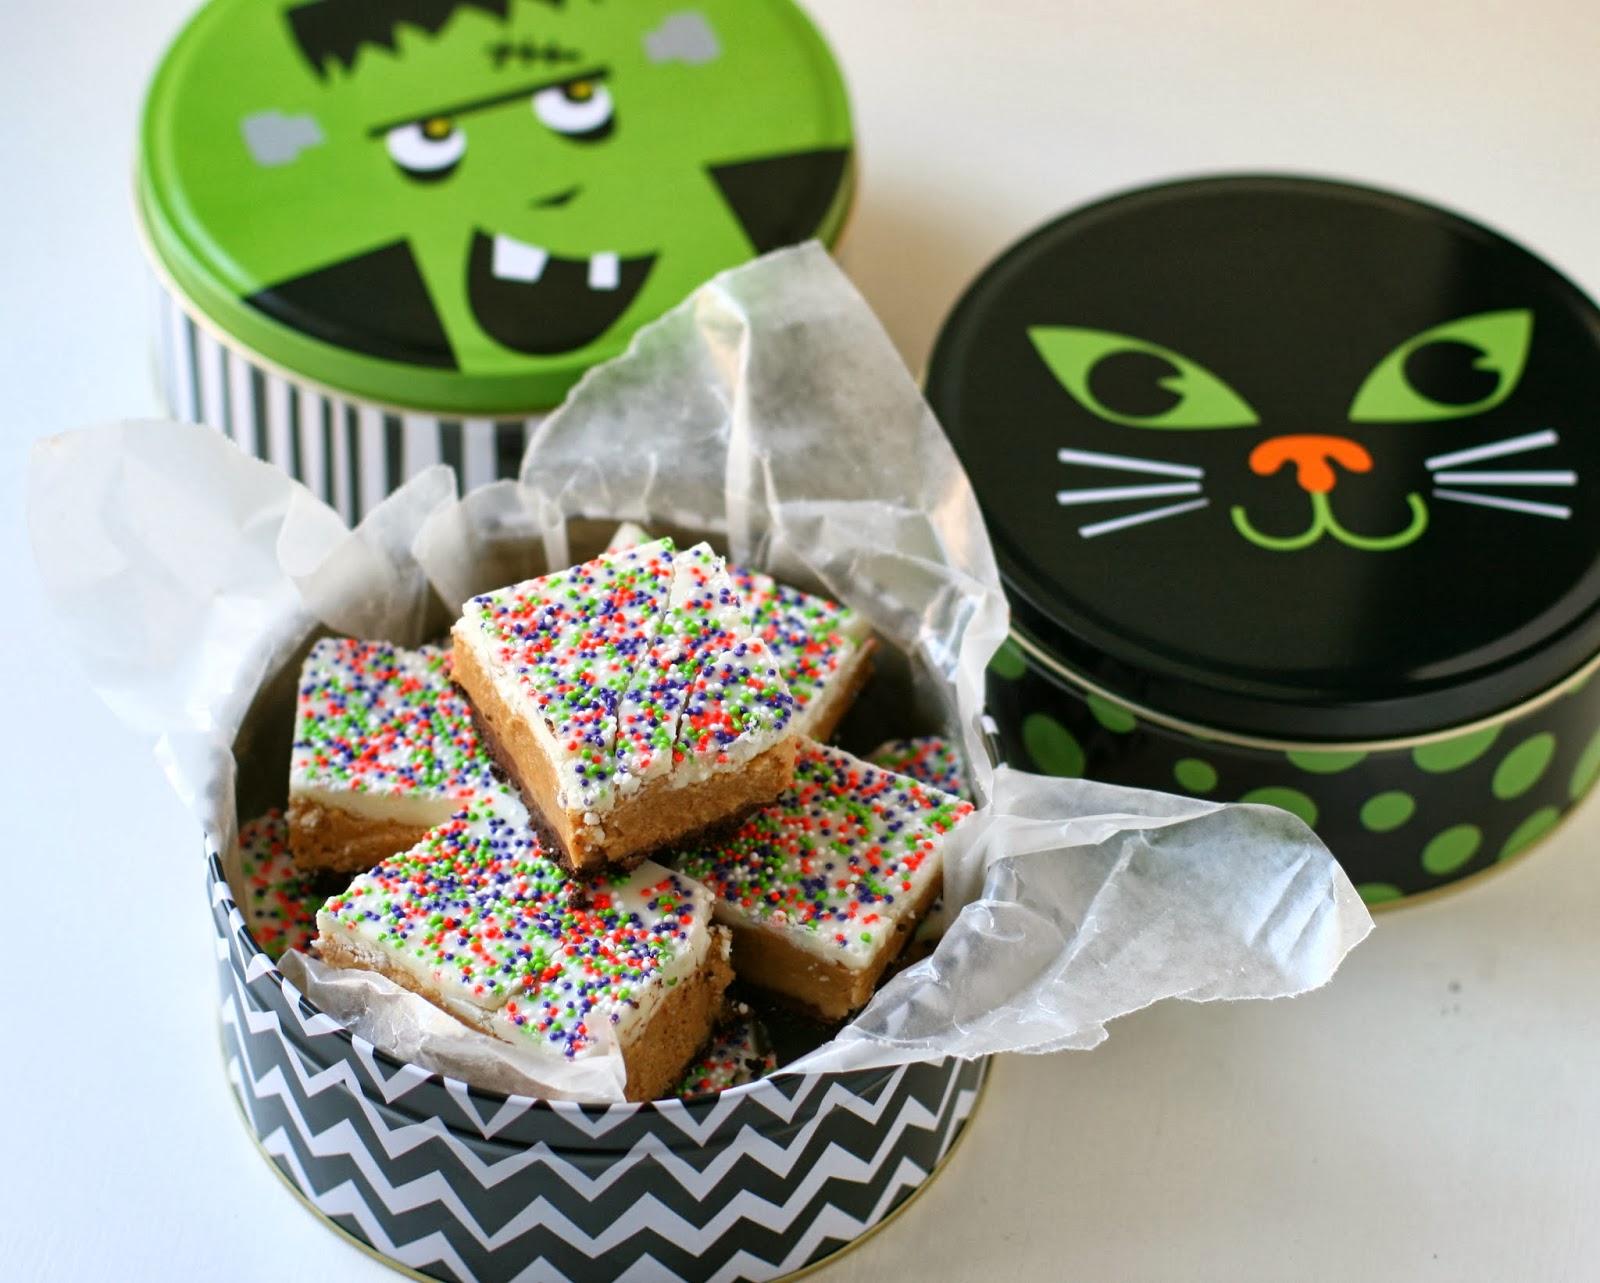
 

Once the treats were cut into squares - they were packed into cute Halloween Tins.  


Plus a few were kept at home for us to snack on.  

Thanks for reading along,


Thursday, August 1, 2013

Project Thursday: Puppy Chow

One of our favorite things about Summer are the unplanned Sleepovers.  
When an afternoon get together is going so well - they just can't say goodbye.  

Unfortunately, I'm not always prepared to feed an unexpected group of girls FUN snacks.

This is my Go To Sweet Treat for those occasions (and many more).

PUPPY CHOW


 Up Close - you can see why it's called that.  Looks a bit like dog kibble - right?

It really should have a much more fun name.  Any Suggestions.
 

 It's super easy to make - and I usually have all the ingredients on hand:

1 Stick Butter (1/2 cup)
1 Cup Creamy Peanut Butter
1 Small Bag Chocolate Chips
Box Crispix Cereal (or Chex)
Confectioners Sugar

Melt together the butter, peanut butter and chocolate chips over medium heat, stirring constantly.  Pour half the bag of cereal into a large bowl.  Pour half the melted chocolate mixture over cereal.  Layer remaining cereal and melted chocolate.  Gently toss the cereal until it is completely coated with the melted chocolate mixtire.  

Transfer the coated cereal to a large brown paper grocery bag.  Add Confectioners Sugar (approx 1/2 bag).  Roll down the top of the brown bag to seal and shake the mixture until it is all coated with sugar (adding more if necessary). 

There are several versions of this recipe - but this is my favorite.  I've been making it for over 20 years (I just noticed the date on the original recipe that was shared by a co-worker back in 1991). 

Back then - we used to serve it in a plastic dog dish - and it really did look like Puppy Chow.


This time - we opted for a colorful paper bowl - a little more fitting for a sweet group of teenage girls. 

You can even customize the colors by adding your favorite candy mix after the pieces are coated and sugared.  

Warning:  there will be white powdered fingers and faces for as long as this yummy mix lasts (which in our house is not very long).


Enjoy - Thanks for reading along,


Thursday, October 18, 2012

Project Thursday: White Chocolate Candy Corn Fudge

Since this weeks Challenge (TPE170) is a Treat Holder - I though I would share a quick and easy Sweet Treat to Eat.

White Chocolate Candy Corn Fudge

I'm not a big white chocolate fan - but my 11 year old daughter (Little K) sure is.  This easy recipe was perfect for her....to make...and to eat.

There are only 3 ingredients:

6 Cups White Baking Pieces
2 Cans (14 oz. ea) Sweetened Condensed Milk
Vanilla

The recipe is a simplified version of this holiday classic (I just omitted the dried fruits and nuts).  

Line a 9 X 9 baking pan with foil, spray with cooking spray and set aside.


Combine the baking chips and milk in a large heavy saucepan/pot.  Cook over medium low heat, stirring constantly until pieces are melted.  


Be careful not to let the bottom scorch.  Constant stirring is the key to getting all the chips melted.  

Remove from heat and stir in vanilla (approx 2 tsp - sorry I don't really measure).

Pour 1/3 of the melted mixture (white) into the Foil Lined baking pan.  

Separate the remaining mixture into two even parts.  Use Food Coloring to tint one portion Orange and pour over the white layer in the baking pan.

If necessary - return to heat to keep consistency fluid. 
Tint the last 1/3 of the melted mixture Yellow and pour over the orange layer.

(sorry no pictures for this part, I was trying to move quickly before the chocolate mixture set)

Refrigerate the layered fudge mixture overnight (at least 6 hours) until firm.

Remove the layered fudge from the pan and peel away the foil (the cooking spray will make it easily release)

Cut into 1" strips.

I was really worried about how uneven my layers were.  I completely misjudged the first white layer and thought I would have to make another batch...but I decided to try cutting it anyway.  

Cut each of the strips into triangles.  

Surprisingly, once the sloppy ends were cut away - the remaining layers turned out looking pretty much like Candy Corn - even though my layers started out very uneven. 

Separate the cut pieces and refrigerate for another hour (so the cut edges harden as well).

If you are a Candy Corn Expert - you will notice that by cutting the strips into triangles, you end up with different combinations of layers. 

Only one is "officially" correct.  

So I decided to add some decoration to the ones that were not perfectly Candy Corn colored.  

I dipped the bottom of the fudge piece intp a sugar glaze (confectioners sugar and water) and then into a mixture of Yellow and Orange Jimmies.  I also dipped some into tiny white nonpareils (because I ran out of Jimmies).  

The combination of the decorated and classic candy corn colored fudges make a pretty presentation on a Plate, in your Treat Bag...


...or even as a neighborhood Boo Gift.  


Thanks for Reading Along. 


Monday, June 7, 2010

The Pink Elephant - TPE70


The Color Red, Scallops, and a Bow

Thank you all for another fabulous week!!

It is officially summer and we hope you enjoy all the summertime fun!!
Sheri Gilson is the hostess this week of our super duper fun challenge, so if ya love it like
I do...give her a big shout out!! Woo Hoo...Thanks Sheri!!


We are super excited about the marvelously talented creator of the adorable
Baby Buds


Mary Anne Wainright

Guest Designing with us today!!
A little secret...she will also being joining us next week...woo hoo...The Baby Buds
have their own store now (you can find it HERE) and will be
sponsoring TPE next week!!
Yipppeee!!

The Pink Elephant Designers

Ella's Girls
___________________________


Sheri Gilson


Lori Boyd
Get your own LadyBug Lollipop HERE


Krista VanTol
Lisa Hjulberg


Challenge 69 Winners
Bright Colors

Jessi

Congrats Jessi!!


Jan

Joni

Victoria


And our randomly drawn prize winner is:


31. nnalorac

Congrats to Everyone!!
We hope you will wear your winner's banner proudly!!
Woo hoo!!

Randomly Drawn Prize winners can contact us at:
thepinkelephantblog@gmail.com
for details on how to collect your prizes!!
Thanks you all!!
_________________________________________
Thanks so much for joining us!!
_________________________________________
Challenges will
begin on
Mondays at 12 Midnight EST
and
close on
Sundays at 12 midnight EST

If you upload your card to SCS, PCP or any other
gallery please use keyword TPE, but also add a
link to it in Mr. Linky so we are sure to see it.
___________________________________________

Sunday, April 5, 2009

TPE- Challenge #9

Wow!! We can hardly believe it's already week #9 at The Pink Elephant!!
We are having such a fun time and we hope you all are as well!!

As you can tell from the banner above, this week's challenge is a Recipe Challenge.
The Recipe is:

Use Stamps, Embossing and Punches


Here are the Design Team Inspiration Samples:

Tina

Angela

Lori R.

Robin Willis

Lori Boyd

Ann

Carol
Challenges will begin on Mondays and Close Sundays at 12 midnight EST !!
Winning entry (along with two runner up entries) will be announced on Tuesday Evenings.
If you upload your project to SCS please use keyword TPE, but also add a link to it in Mr. Linky so we are sure to see it.

This week our prize is a stamp set & comes to you from
Christina Franco
of
Thanks Christina!!
~~~~~~~~~~~~~~~~~~~~~~~~~~~~~~~~~~~~~~~~~~~~~~~~~~~~~~~~~~~~~~~~~~
Challenges are open to worldwide participants. All projects are welcome...cards, layouts, altered items and any other paper projects. To enter, post a link to your creation in the Mr. Linky box below. For complete instructions on how to enter challenges, there is a tutorial in the FAQs on the sidebar.
**note: If you have any trouble with Mr Linky, please just add your name and direct link in a comment telling us that you are having problems and one of the we will be happy to add your link so you are entered into our challenges.**


1. Nikki
2. Rita
3. ChrissyC
4. DawnM
5. Lorraine
6. Sue Whyte
7. Fi
8. Andrea
9. Gayle Page-Robak
10. Terry
11. Lisa Foster
12. nancy sanders
13. Cath Thompson (edited to add TPE website in post)
14. Lucille
15. Julie Martin
16. Julie Martin (2nd)
17. Christina
18. Lorraine
19. Alison~Tillymint
20. wendy
21. Beryl (bik59)
22. Helen
23. Alanna
24. Maria Matter
25. Karen Valentine
26. Sonia Kertznus
27. Susan Daly
28. Jess
29. Paula
30. Vickilyn
31. Anita Hovey
32. Rose-Anne
33. Kath
34. Sandra Dry
35. julie
36. Amanda
37. Shar B
38. Pauline C
39. Christi Bryant
40. WendyP
41. Katy salvo
42. irene
43. Leslie Pershing
44. Enfys
45. Libby
46. Chrissie
47. Betty aka ZacksNana
48. creatiefblog
49. DeannaC
50. Cher Kosakura
51. Carol D

Powered by... Mister Linky's Magical Widgets.