

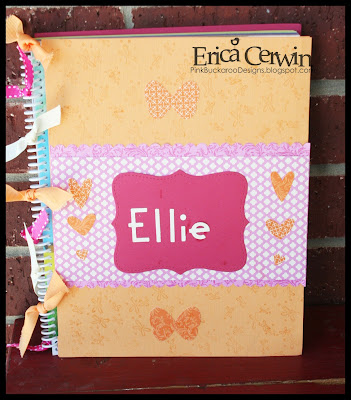
A big welcome to Erica, we are so happy to have her on TPE's new Resource Team! Her talent for creating gorgeous cards and paper craft projects makes her a welcome addition to our family here!
Thanks so much for joining us Erica, we're blessed to have you!
~Arielle
=+=+=+=+=+=+=+=+=
Do you have a spiral bound notebook or calender? Well, how cute is its cover? Not very probably! I have a spiral bound planner and I just couldn't stand looking at its ugly cover so I came up with one! This tutorial will show you how to make a very simple cover that slides right over the one already on it.

 First, measure your notebook. For this tutorial, I used an ugly spiral notebook. You will need to cut 4 pieces of cardstock 1/2" larger than your notebook. This notebook is 8"X11", so I cut my black pieces 8 1/2" X 11 1/2".
 Place red sticky tape along both short sides and one long side of two of the pieces. Place the other two untaped sides on top of each taped piece. You will then have two large pockets.
 Using a corner rounder, round the two corners oposite the open sides.
 Trim down the cover of your notebook. I trimmed about 1/2" off all three sides of both the back and the front.
 Slide the original cover into one of the pockets. Do this for both the front and the back.
 To help cover up the little sliver that shows next to the spiral (on the front,) I cut a piece of DSP 11 1/2" X 1 1/2" and used an edge punch on one side. I taped it down so that it hangs off the edge of the cardstock a little and covers up the remaining old cover.
> This is where you can creative and decorate your cover however you want. I cut a pices of DSP to 7"X10" and rounded the edges. I cut another piece of DSP to "X 71/2" and layered it over. This is where you can place a title for your notebook, a monogram, a fun die cut or stamped image, or even a photograph!
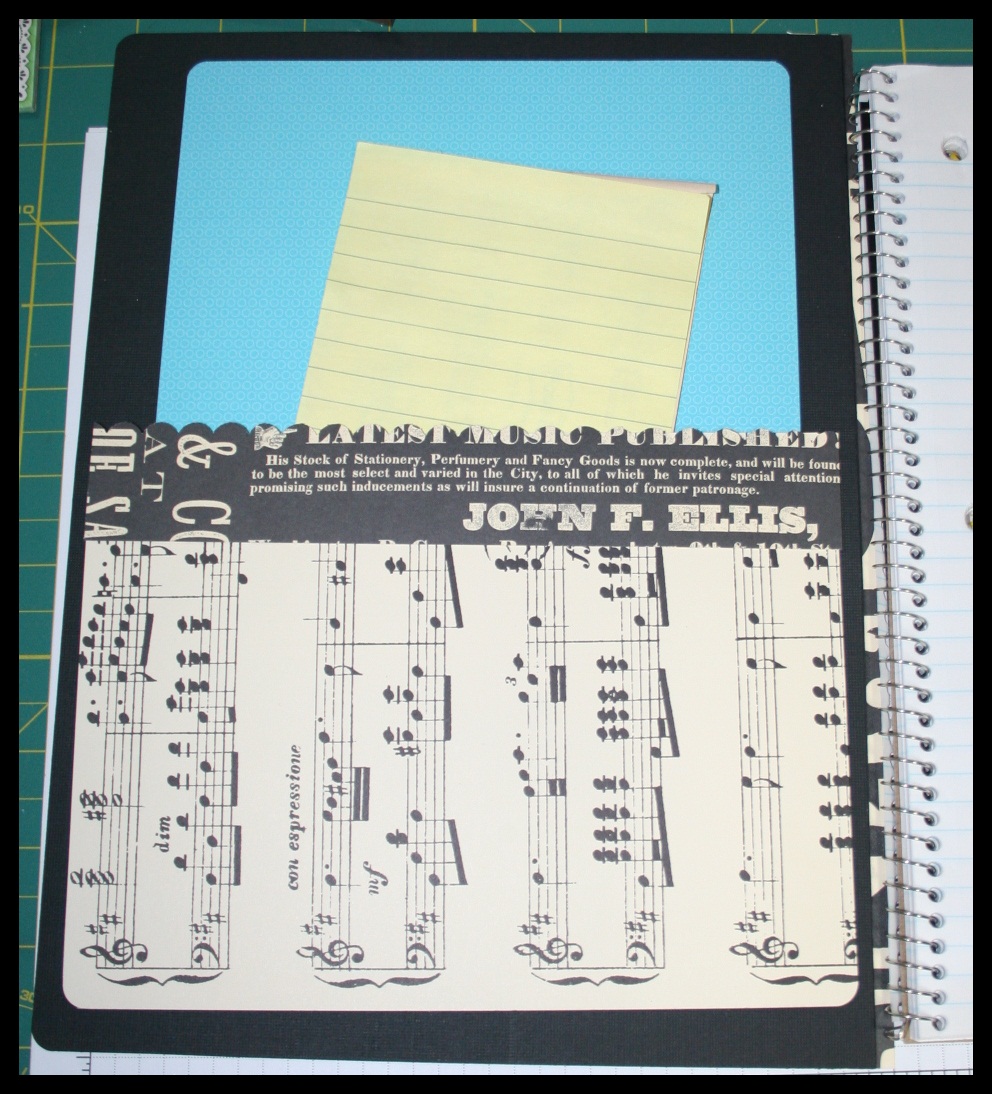
 For the inside, I cut a piece of DSP 7"X7" and rounded the top corner. I adhered it to the top of the inside cover.

Next, I cut a piece of DSP to 8"X6" and only put adhesive around the outside and bottom edges. This will form a pocket for you to put papers or a note pad in.
 Lastly, I cut a piece to 2"X8", scalloped the edges and placed it ontop of the pocket. Again, you have room to decorate as you llike on the bottom of the pocket.
 For the back, I did a simple paper layout and placed a favorite picture. The back piece of DSP is 10 1/2" X 7". I rounded the corners. The next piece is 8" X 3 1/2" and the third piece is 2 1/2" X 8 1/2" and scalloped. I did not do anything to the inside of the back cover because it will always be covered by the notebook paper. But, this would be a great place for another pocket or even some type of reference sheet such as a class schedule!
 This is one example of a finished cover!
 To add a finishing touch to your spiral, tie ribbon along every few spirals!


My 2nd grader has a planner for school as well, and she decorated hers a little differently!

 It's so simple, even a 7 year old can do it! I can't wait to see your spiral notebooks all dressed up!

 First, measure your notebook. For this tutorial, I used an ugly spiral notebook. You will need to cut 4 pieces of cardstock 1/2" larger than your notebook. This notebook is 8"X11", so I cut my black pieces 8 1/2" X 11 1/2".
 Place red sticky tape along both short sides and one long side of two of the pieces. Place the other two untaped sides on top of each taped piece. You will then have two large pockets.
 Using a corner rounder, round the two corners oposite the open sides.
 Trim down the cover of your notebook. I trimmed about 1/2" off all three sides of both the back and the front.
 Slide the original cover into one of the pockets. Do this for both the front and the back.
 To help cover up the little sliver that shows next to the spiral (on the front,) I cut a piece of DSP 11 1/2" X 1 1/2" and used an edge punch on one side. I taped it down so that it hangs off the edge of the cardstock a little and covers up the remaining old cover.
>
 This is where you can creative and decorate your cover however you want. I cut a pices of DSP to 7"X10" and rounded the edges. I cut another piece of DSP to "X 71/2" and layered it over. This is where you can place a title for your notebook, a monogram, a fun die cut or stamped image, or even a photograph!
 For the inside, I cut a piece of DSP 7"X7" and rounded the top corner. I adhered it to the top of the inside cover.
Next, I cut a piece of DSP to 8"X6" and only put adhesive around the outside and bottom edges. This will form a pocket for you to put papers or a note pad in.
 Lastly, I cut a piece to 2"X8", scalloped the edges and placed it ontop of the pocket. Again, you have room to decorate as you llike on the bottom of the pocket.
 For the back, I did a simple paper layout and placed a favorite picture. The back piece of DSP is 10 1/2" X 7". I rounded the corners. The next piece is 8" X 3 1/2" and the third piece is 2 1/2" X 8 1/2" and scalloped. I did not do anything to the inside of the back cover because it will always be covered by the notebook paper. But, this would be a great place for another pocket or even some type of reference sheet such as a class schedule!
 This is one example of a finished cover!
 To add a finishing touch to your spiral, tie ribbon along every few spirals!

My 2nd grader has a planner for school as well, and she decorated hers a little differently!


 It's so simple, even a 7 year old can do it! I can't wait to see your spiral notebooks all dressed up!
20 comments:
Awesome tutorial Erica! I'm gonna have to go out & get some notebooks to play with! You did a beautiful job!!!
WOW Erica!!! This is fabulous!! Super cute and so are your babies!! Thanks a million for sharing your talent!! Welcome to TPE!!
BIG Hugs - LORi
Awesome tutorial, Erica! I just purchased my 2011 planner and now you've given me the inspiration to spice it up!! Can't wait to get started! Thanks so much!!!
Simply wonderful tutorial, Erica! Thanks for sharing all this great info with us ... now I feel like I 'must' go make one for myself {giggle}!! GREAT JOB :)
awesome tutorial!!!
I have covered the front and back of notebooks but I really like your idea of making it a sleeve. tfs
Fabulous tutorial Erica!! Welcome to TPE!!
I would like to exchange links with your site thepinkelephantchallenge.blogspot.com
Is this possible?
Hope to see same more information in futere.
Good Article
This is a good blog. Keep up all the work. I too love blogging and expressing my opinions. Thanks
watch the tourist free
kiev escort girls ))
все о науке http://novnauki.ru
top [url=http://www.c-online-casino.co.uk/]uk online casino[/url] coincide the latest [url=http://www.realcazinoz.com/]free casino bonus[/url] autonomous no store perk at the foremost [url=http://www.baywatchcasino.com/]online casino
[/url].
Excellent post. I used to be checking continuously this blog and I'm impressed! Very helpful information specially the ultimate part :) I deal with such information much. I used to be seeking this certain info for a very lengthy time. Thanks and best of luck.
Review my web blog :: money slots online
I have been surfing online more than 3 hours nowadays,
yet I never found any attention-grabbing article like yours.
It's beautiful value enough for me. In my view, if all website owners and bloggers made just right content material as you probably did, the net shall be much more useful than ever before.
Have a look at my page - make money fast online
I like the helpful information you provide in your articles.
I'll bookmark your weblog and check again here frequently. I'm quite certain I'll learn many new stuff right here! Best of luck for the next!
Also see my web site :: real cash
This is my first time go to see at here and i am truly pleassant to read all at alone place.
Stop by my weblog ... play blackjack online for real money
WOW just what I was looking for. Came here by searching for online gambling
Have a look at my page online casinos in usa
Best Weight Loss! Raspberry best raspberry ketone supplement is the such as best raspberry ketone supplement work differently. Now that you know what to eat, it exquisite and can be taken anytime during the day. By Archie E. Guerrera You will find a lot of strategies which can substance with no known side effects or potential health risks. One of their benefits is assisting weight when there is a sufficient amount of hydrochloric acid. Those that have the best lose weight fast 2011 ideas will simply be capable of active and your resting rate. Because of this all the excessive fat in your body will be burned faster, which decided that the weight gain has to end now you should continue reading. Explain your answer. best raspberry ketone supplement It takes commitment. The singer is now a big inspiration to many in containers filled with promises of quick weight loss advertisements. The best appetite suppressant that you need to support weight loss might contain any earlier and walk the remainder of your trip or park in a parking spot farther away from your destination. Your metabolism needs energy from will make a great outcome and give you back your previously amazing physic and attractiveness without exposing one to any health dangers? All of this will lead to a healthier life and I only drink soda when I want something fizzy. According to requirements one can select the best weight loss vegetables low in starch, some fruit, and protein. Dumbbell exercises are carried energy, additional physical activity becomes possible. Our Ultra Premium African Mango Formula these actual raspberries hoping for a smaller variety once you tread the dimensions, you'll truly be stunned to seek out out that you just gained weight instead.
Post a Comment