
Good morning!
If you've not checked in recently, we're doing things a little differently here these days, and our challenges are now running for 2 weeks at a time. We are also adding some nifty tutorials and how-to articles.
For those of you who may have been a little wary of using digital images because you think you need some "special" computer program, this one's for you!
Most computers have Microsoft Word, and it's a perfect tool for working with digital images and this quick tutorial will show you how!
Once you have your image, open a blank Word document.
Click on "Insert" and then "Picture". A box will open up for you to choose the digital stamp you want to open. Once you choose it, click the "Insert" button. (You can click on the images below to see them larger.)

Once your digi opens, click "Format", then "Position" and then "More Layout Options".

Choose "Behind text". I always do this because it lets you move the image around the page so that you can either add other images or multiples of the same one. Sometimes it's good to make a few of the same image on the page in case you make a mistake working with the first one.

Next click "Crop". This will allow you to trim any white space around an image.

Once cropped, you can then re-size the image by choosing the little checkbox on the bar that says "Size". If you crop the image closely you will know exactly the size at which your image will print.

Following the same steps, I usually will go ahead and add some digital papers to the page to print. I plan on paper piecing with the red polka dot paper, so I crop it to just fit the image.
When you choose to set these images "behind text" you can overlap them, which helps if you're going to paper piece digitally. First I print the patterned paper covering the image, then I move it over & run my paper through the printer again. Now the image is "colored" in & I can cut it and piece it.

Or, if I'm going to color with Copics, but I have some other papers I want to use for my card, I'll set my page up like this. Once printed, I use these like I would any paper for my card. The cool thing is, I can save the file and print it again if I ever need to!

I hope this little tutorial has alleviated some of the fears people have of trying digital stamps. And if you have any questions, please feel from to email me!
Bye for now...


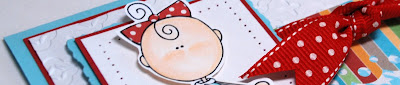
PS - I didn't have time to show a peek of my finished card until now... for the full card visit my blog!
13 comments:
oh bless you for this as have been trying to work this out for ages,me being a bit thick he he,but this has really helps as it was only one thing i was not doing corectly so many thanks hun hugs cheryl xxxxxxx
This is a wonderful tutorial THANK YOU! I am going to try and do it this way.
FAB-U-LOUS, Arielle!!!!! Thanks so much for sharing your technical expertise!
WOW Arielle!! This is AWESOME!! What a wonderful idea and very very helpful!!
Thanks so much!!!
hugs- LORi
Thank you very much. I used to "guess" what size my image would come out and waste paper. Very helpful!
Kim
Fabulous tut, Arielle!! I love how you showed us to use digi papers too..can't wait to give that a try!!
Thanks so much for sharing this tutorial! I am new to digi and just print the image the way it is. I have to see if my computer has word, if not my daughter's does. I know I don't have one of the programs, the kids know more than I do. lol
Awesome tutorial Arielle. I'm sure we all have learned something new today. Thanks for taking the time to prepare this... you deserve an A+!!
Hugs,
Hi!!
Before I read this one day i try to do this but something wrong i did... Thinking now your tutorial help me.
Thanks so much for sharing this tutorial!
Hello! I just found your website for the first time! I'd love to get into scrapbooking and cardmaking but am a bit intimidated. I'll be stopping by lots and am happy to be your newest follower!
~ www.billiemonster.com ~
Thank you!!! Thank you!!!
Deanne :)
WOW!
What a wonderful idea! All this time I saw cards created that way and assumed the gals were fabulous with Paper Piecing!
Now...I know the secret! THANKS a millions!!
Lisa
I tried it and this is the best tutorial EVER!!!! Thanks again!
Deanne :)
Post a Comment